

.png)


Migrating your website from Webflow to WordPress can feel puzzling, especially if you're worried about losing your design, content, or SEO rankings. But don’t worry, you're not alone! We’re here to make the process as smooth as possible.
In this guide, we’ll walk you through each step, so you can move your site without the stress and keep everything running perfectly. Let’s get started!
Before you start migrating, having the right tools can make the process much easier. Here are some tools that can help you move from Webflow to WordPress smoothly:
In a Nutshell:
- Webflow for B2B SaaS: Webflow offers fast, scalable design with minimal maintenance, perfect for SaaS websites that need to grow and adapt quickly.
- Migration Process: Migrating from Webflow to WordPress involves backing up content, setting up WordPress, and manually transferring data or using plugins for ease.
- Tools for Easier Migration: Use tools like WP All Import, Elementor, UpdraftPlus, and Yoast SEO to simplify the Webflow to WordPress migration, making the process faster and smoother.
- Design Flexibility: Webflow provides complete control over custom design, enabling unique, responsive sites without limitations found in pre-built WordPress themes.
- SEO & Performance: Proper migration and setup of SEO tools and permalinks in WordPress ensures you retain rankings and optimize website speed post-migration.
Tools to Help Simplify the Webflow to WordPress Migration Process
- WP All Import: Easily imports content (like pages and images) from Webflow to WordPress using CSV or XML files.
- Elementor: A simple page builder that lets you recreate Webflow’s custom designs on WordPress with drag-and-drop features.
- UpdraftPlus: A backup plugin for WordPress that helps you save your site during migration, preventing any data loss.
- Yoast SEO: A popular SEO plugin for WordPress that helps optimize your site’s settings and keep your search rankings intact after migration.
These tools make your Webflow to WordPress migration much quicker and simpler, ensuring everything runs smoothly.
Now, it’s time to get down to business
Step-by-step Guide to Migrating From Webflow to WordPress
As you might (or might not have) already guessed, the process starts with a well-thought-out migration plan.
Step 0: Planning the Migration
Before diving into the actual process, having a solid plan in place is crucial for a smooth transition. Here’s what to consider during this phase:
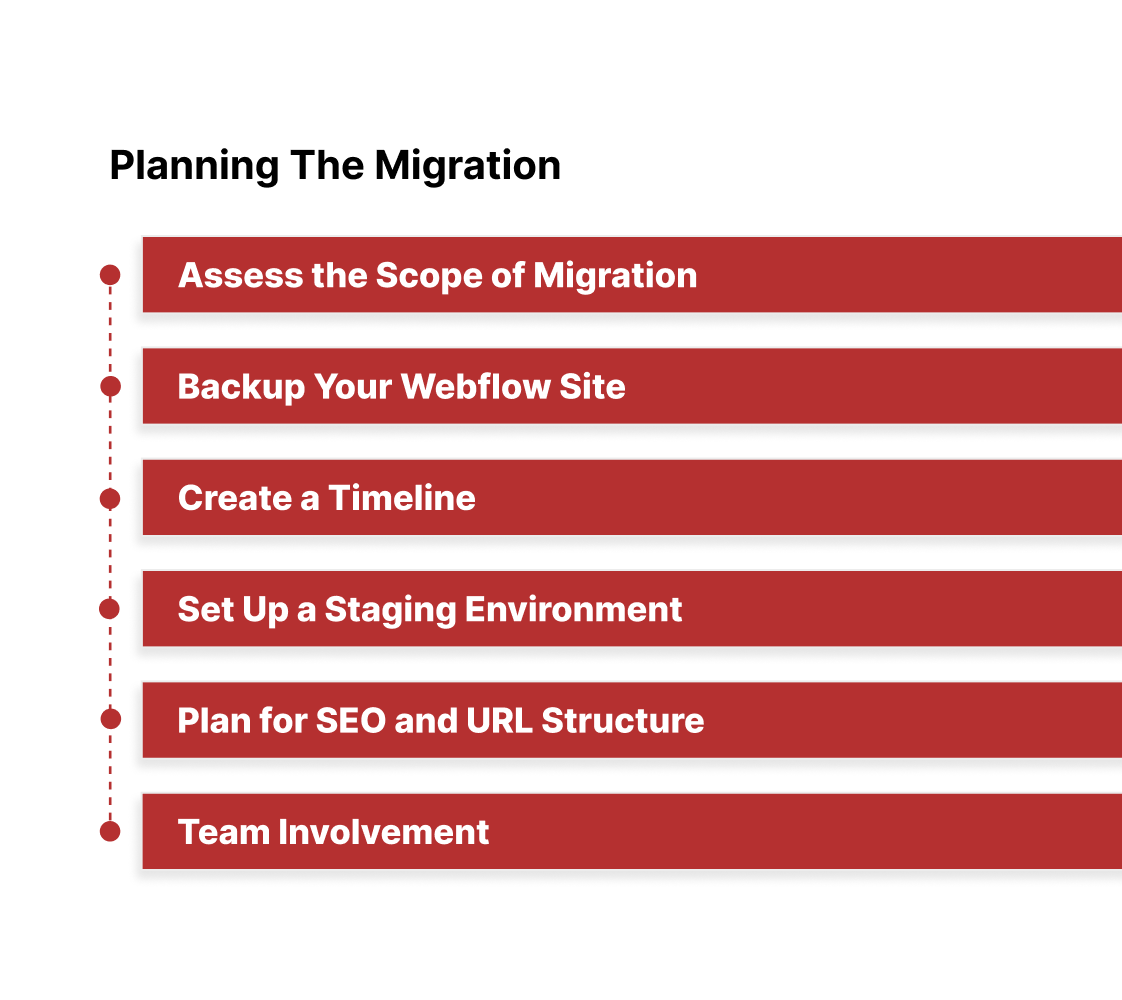
Alt text : Planning the Migration
- Assess the Scope of Migration: Review your current Webflow site to determine what needs to be migrated. This includes all pages, blog posts, images, videos, custom code, and other assets. Determine if any content can be simplified or updated during the migration, or if everything should be moved exactly as-is.
- Backup Your Webflow Site: Make sure to create a full backup of your Webflow site before starting the migration. This serves as a safety net in case you need to revert any changes or recover missing content.
- Create a Timeline: Establish a realistic timeline for the migration, taking into account your team’s availability, potential challenges, and other business priorities. A typical migration may take anywhere from a few days to several weeks, depending on the complexity of the site.
- Set Up a Staging Environment: If possible, create a staging environment on WordPress where you can work on the new site without affecting your live website. This will allow you to make adjustments and test things out before going live.
- Plan for SEO and URL Structure: Make sure to note the URL structure of your Webflow site and determine how you’ll set up redirects or maintain SEO rankings during the migration. This is an essential step to avoid any negative impact on search engine performance.
- Team Involvement: Identify the key team members (web developers, designers, content creators, etc.) who will be responsible for different aspects of the migration. Make sure everyone understands their roles and responsibilities during the process.
With this step in place, you're now ready to move forward with the actual migration. Here's the complete process, now starting from Planning the Migration:
Step 1: Backup Your Webflow Site
Before starting the migration, ensure that you have a complete backup of your Webflow site, including:
- All page content (text, images, videos, etc.)
- Any custom code
- Exported CSS/HTML files (if you plan to do a manual migration)
Step 2: Set Up a WordPress Site
You'll need a fresh WordPress installation. If you don't already have one, set it up by:
- Choosing a hosting provider (many WordPress hosting providers such as Bluehost, SiteGround, or WP Engine offer easy WordPress installations).
- Installing WordPress (this is often a one-click install process provided by most hosts).
- Setting up your domain and basic settings on WordPress (permalinks, time zone, etc.).
Step 3: Choose a WordPress Theme
Alt text : Choose a WordPress Theme
Webflow allows you to have a completely custom design, but WordPress uses themes. You can either:
- Use an existing theme: Find a theme that matches the look and feel of your Webflow site as closely as possible.
- Build a custom theme: If you want the exact same design, you can build a custom WordPress theme (using a page builder like Elementor or creating a theme from scratch).
Step 4: Migrate Content (Pages, Posts, Media)
The most important step in migrating from Webflow to WordPress is transferring your content.
Option 1: Manual Migration
- Create pages manually: In WordPress, you will manually create new pages and copy the content from Webflow to WordPress.
- Copy text: Copy the text from your Webflow pages and paste it into the corresponding WordPress page.
- Upload images: Download the images from Webflow (via the Webflow asset manager or right-clicking on the images) and upload them to the WordPress media library.
Option 2: Use a Plugin for Content Migration
There are tools and plugins available that might help to export content from Webflow to WordPress in an automated fashion, such as:
- Webflow to WordPress plugin (through third-party tools): Some third-party tools claim to help automate the migration of content from Webflow to WordPress, but these are usually not perfect and may require some manual tweaks afterward.
Step 5: Rebuild the Layout and Design
Webflow allows for a completely custom design, while WordPress relies on themes and page builders. To replicate the design, you can either:
- Use a page builder (e.g., Elementor, WPBakery): These tools allow you to design a custom layout within WordPress, and they work similarly to Webflow’s drag-and-drop editor.
- Customize the WordPress theme: If you're building a custom theme, you'll need to write the necessary HTML, CSS, and PHP to replicate the Webflow design.
Step 6: Migrate Webflow Interactions & Animations

Alt text : Migrate Webflow Interactions & Animations
Webflow offers animations and interactions, which are usually done using Webflow’s visual editor. On WordPress:
- Manual migration: You’ll need to recreate any animations or interactions using JavaScript, CSS, or a page builder like Elementor that has built-in animation features.
- Custom code: If you're building the site manually, you'll need to transfer any custom JavaScript and CSS that Webflow used for interactions into your WordPress theme.
Step 7: Set Up Permalinks and SEO Settings
Ensure that the URLs in WordPress match the ones from Webflow (or set up redirects if necessary):
- Permalinks: Adjust the permalink settings in WordPress to match the structure you had in Webflow. This will prevent broken links.
- SEO: If you were using Webflow’s built-in SEO features, replicate those settings in WordPress by using an SEO plugin like Yoast SEO.
Step 8: Test the Website on WordPress
Before you go live, thoroughly test the website on WordPress:
- Test functionality: Check if all links work, images are correctly displayed, and forms (contact forms, etc.) are functioning.
- Check responsiveness: Ensure the website is mobile-friendly.
- Check page speed: WordPress sites can sometimes be slower than Webflow sites, so optimize for speed using plugins like WP Rocket or by compressing images.
Step 9: Launch the WordPress Website

Alt text : Launch the WordPress Website
Once the site is set up, tested, and ready to go, it’s time to launch. You can do this by:
- Pointing your domain to your WordPress site.
- Ensure all settings are correct and the site is live.
Step 10: Monitor and Update the WordPress Site
After launch, continue to monitor the site for any issues and update it regularly:
- Keep WordPress, themes, and plugins up to date.
- Monitor performance and make any necessary optimizations.
- Regularly back up your site.
By starting with proper planning, the migration process will be smoother, and you'll ensure that the transition from Webflow to WordPress goes as smoothly as possible.
Now, as a B2B SaaS business, your website is one of the most important tools you have for attracting and converting potential customers.
Choosing the right platform to manage your site is a big decision, and while there are plenty of options out there, Webflow stands out as a solid choice. Here’s why sticking with Webflow could be a smart move for your business.
Why Keeping Your Website on Webflow is Better for B2B SaaS
Webflow is an all-in-one platform that allows you to design, build, and manage websites without needing to know a lot of code. It combines easy-to-use visual design tools with a powerful content management system (CMS), making it easy for marketers and designers to take the reins.
Webflow is popular because it gives businesses the control they need over design and content while also being fast and scalable.
For B2B SaaS businesses, where the website plays a major role in bringing in leads and showcasing your services, Webflow offers some strong advantages. Here’s why it might make sense to stay with Webflow instead of switching to WordPress or another platform:
Why Webflow Might Be the Right Choice for Your SaaS Website:
- Faster Time-to-Market
- With Webflow, you can design and launch your website faster than with WordPress. The visual editor lets you build things without waiting on developers, so you can quickly roll out updates, marketing campaigns, or product launches.
Speed matters for SaaS websites, and Webflow lets you move fast when you need to.
- Total Design Freedom
- Unlike WordPress, which relies on pre-made themes that can be limiting, Webflow lets you create a completely custom design.
Your website can have a unique look that matches your brand without needing to spend hours tweaking themes or relying on complicated code. This is a huge benefit when you want a professional, standout website.
- Easy Content Management
- Webflow’s built-in CMS makes it easy to update your content without worrying about plugins. Whether you're adding blog posts, product pages, or case studies, you can manage everything in one place.
If you’re running a SaaS business with a lot of content to update regularly, this can save you time and hassle.
- Built for Growth
- As your B2B SaaS business grows, Webflow grows with you. Unlike WordPress, where you might need to manage lots of plugins, Webflow’s simple structure means you won’t run into compatibility issues down the road.
You can scale without worrying about performance slowdowns or maintenance headaches.
- SEO Made Easy
- Webflow comes with built-in SEO tools, so you don’t need to rely on plugins like Yoast SEO in WordPress. Its clean code, fast load times, and SEO-friendly features make it easier for search engines to find and rank your website. That’s a big plus for attracting organic traffic to your SaaS site.
- Reliable Security and Hosting
- Webflow’s hosting is fast and secure, with a global content delivery network (CDN) to speed things up for visitors worldwide. Plus, Webflow handles all the security and maintenance, so you don’t have to worry about updates, server issues, or keeping everything patched like you would with WordPress.
- No Plugin Hassles
- One of the frustrations with WordPress is managing a ton of plugins. Webflow doesn’t rely on plugins, which means no worrying about keeping them updated or dealing with security vulnerabilities. You can focus more on your business and less on site maintenance.
- Mobile-Responsive from the Start
- Webflow ensures your design is responsive from the ground up. For a SaaS business, making sure your website works seamlessly on mobile devices is key, and with Webflow, it’s built in.
You don’t need to worry about adjusting themes for mobile or running into layout problems down the line.
- Easy Analytics Integration
- Webflow makes it easy to connect to tools like Google Analytics and HubSpot to track your site’s performance. You can monitor traffic, user behavior, and conversion rates in real time, which helps you make data-driven decisions to improve your SaaS site.
- Empower Your Team
- With Webflow, your marketing or product teams don’t need to rely on developers for every little change. They can make updates directly, meaning quicker turnaround times for changes and updates. That’s a huge win for productivity, especially if you’re working with a lean team.
- Consistent User Experience
- Webflow lets you maintain consistency across your site, making sure everything works well together - from design to functionality. This leads to a smoother, more cohesive user experience, which is key to converting leads into customers.
Design a Scalable Webflow Website With Beetle Beetle
For a B2B SaaS business, your website is the first place many potential customers will interact with your brand. Webflow makes it easier to keep everything running smoothly with fast updates, a beautiful design, and the ability to scale as you grow.
If you want a platform that’s easy to manage, quick to iterate on, and doesn’t require constant maintenance, sticking with Webflow might just be the best decision for your business.
If you want to design and develop your B2B SaaS website on Webflow, you need experts who truly understand the platform. You’re in luck because Beetle Beetle is a certified Webflow design partner, which means:
- We specialize in custom Webflow design and development.
- Our team ensures your site is scalable and optimized for growth.
- We create responsive websites that look great on all devices.
- We handle everything from design to launch, so you can focus on your business.
Want a website that’s easy to manage, scalable, and looks amazing? Let’s connect and show you how Beetle Beetle can help you build a custom Webflow site that grows with business.
FAQ
1. Why should I migrate Webflow to WordPress?
Migrating from Webflow to WordPress can offer more flexibility, scalability, and control over your website. WordPress is ideal for businesses looking for easy content management, better SEO tools, and a wider range of plugins and integrations.
If you need a more customizable solution with greater support, migrating to WordPress may be a great choice.
2. How long does it take to migrate Webflow to WordPress?
The time it takes to migrate Webflow to WordPress depends on the size and complexity of your website. On average, a basic site may take a few days, while larger or more custom sites could take a couple of weeks. It's important to plan ahead and set aside time for testing and adjustments.
3. Can I migrate my Webflow content to WordPress automatically?
While there isn’t a fully automated tool to migrate Webflow to WordPress, you can manually transfer content or use third-party plugins to assist with the process. Be prepared for some manual work, especially for complex designs or custom code.
4. Will migrating from Webflow to WordPress affect my SEO rankings?
If done correctly, migrating Webflow to WordPress should not negatively impact your SEO rankings. Ensure that you set up proper redirects, maintain the same URL structure, and keep all on-page SEO elements intact to preserve your search engine visibility.
5. Do I need coding skills to migrate Webflow to WordPress?
While some basic coding skills can be helpful, you don’t need to be an expert to migrate Webflow to WordPress. Using page builders like Elementor or WPBakery can simplify the process, allowing you to replicate your Webflow design without heavy coding.
.png)


